Our Story
Ironically on Sept 11, 2020, I found myself thinking and remembering. I not only remembered the loss America suffered on that day in 2001, but also the loss my husband and I went through only one month before. It was also a loss of life –a miscarriage.
I wanted to create something to remember that tiny life, the blessing, and to remind me to hold on to hope despite the loss.
So I went to Joan Fabrics and stood in the middle of an isle lined with yarn, pondering which colors I wanted for my project.
I left with six balls of beautiful cotton yarn and got busy on the rainbow to help us remember and as a symbol of hope.
The rainbow in the Bible, was a symbol to God’s people after the earth was flooded that God would keep his promise of never again flooding the earth. In the context of life and loss, we are never promised anything. We are not promised that everything is going to be okay or turn out or that we will have our hearts desire in the end. But we ARE PROMISED that God is always with us and will never leave us or forsake us. Even in the pain, God is there.
What is a Rainbow Baby?
In recent years in western culture, the rainbow has also turned into a symbol of hope that represents miscarriage or infant loss. A rainbow baby is now referred to as a child born subsequent to a miscarriage, stillbirth, or the death of an infant from natural causes.

The rainbow hung on the knob of our dresser while we were in the States and after our loss. There was something about it that was so comforting– the reminder of our child, the reminder that God is with us, and the simple beauty in the rainbow colors and design.
How to Make a DIY Rainbow
Materials Needed:
- thin wire
- sewing scissors
- thick macrame rope (here)
- 4 to 6 balls of yarn (whatever colors you like)
- hot glue
- big sewing needle (optional)
- white sewing thread (optional)
- small sewing needle
- 1 color of embroidery thread that matches your yarn
Step 1: cut the macrame into rainbow lengths
Lay out the macrame in a rainbow pattern and estimate how big you want it to be. Cut the rope in to rainbow lengths as they are lined up.


Step 2: cut wire for each rainbow color
Next, measure and cut wire that is slightly shorter than each length of rope. Leave about 1/2 to 1 inch on each side. The wire doesn’t need to go to the end since you want to leave some room to fray the ends.

Step 3: wrap each color of yarn around each corresponding piece of rope.
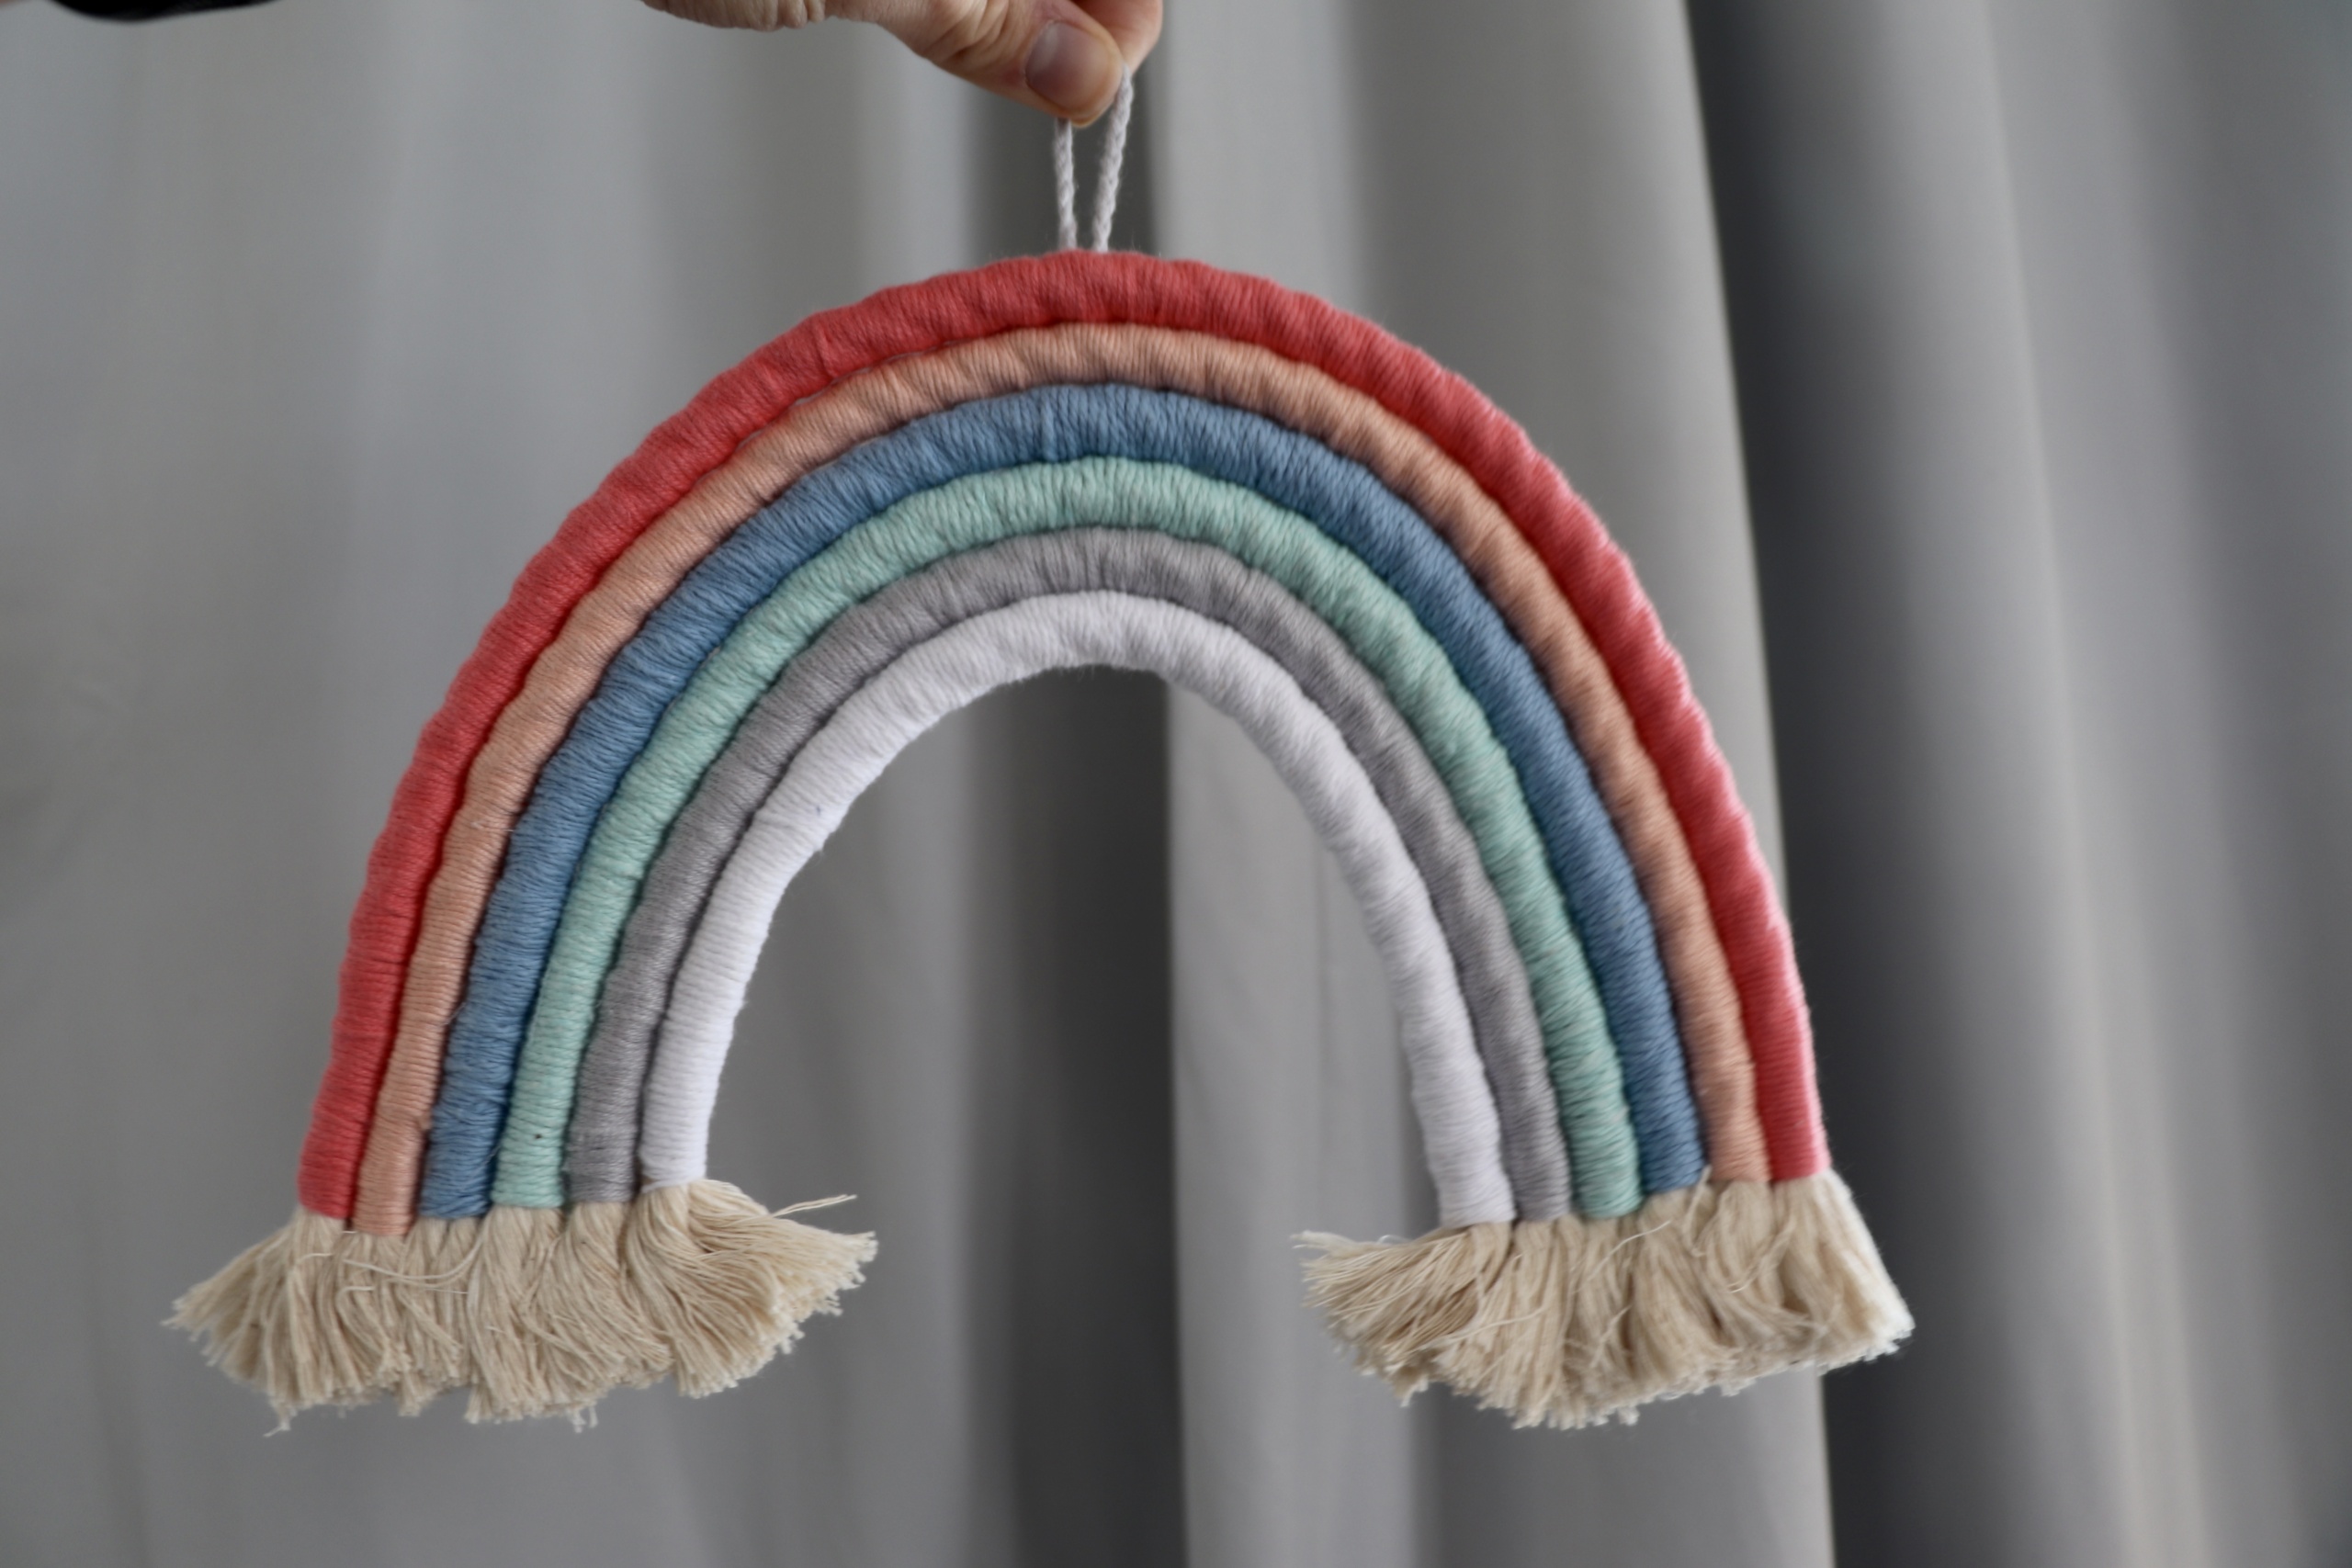
Decide what color you want for each piece of rope. I wanted to start mine with white and then have the colors get brighter from there.
Try to wrap the yarn pretty tightly around the rope, making sure that it looks uniform and there are no gaps to where you can see the rope underneath.
Repeat this with each piece of rope until they are all done.
It’s difficult to make them all line up perfectly since the rope lengthens as you tightly wrap the yarn around it.
Wait until the end to cut the yarn from each piece of rope. That way, if you need to wrap it a few more times, you still can.

Step 4: Cut the yarn from the rainbow rope pieces


Step 5: line up the rainbow rope pieces and place a few dots of hot glue along the back side to keep them together

Step 6: (optional) sew a straight line on the back to reinforce the rainbow

Step 7: create a loop for hanging
braid three pieces of embroidery thread together however long you want your loop at the top to be
knot them together so it makes a loop
sew the loop to the back of the rainbow

Step 8: Cut and fray the ends
cut the ends straight across
comb out the rope ends so it frays at the end of the rainbow

Hang wherever you would like 🙂

